Autoresponders can be used to send a message back automatically to anyone
who sends an email to a certain account.
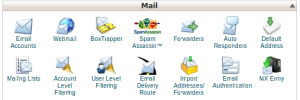
1) For creating / deleting a auto responder , click on “Auto Responders”.
2)Click “Add Autoresponder” to create a new / edit auto responder.
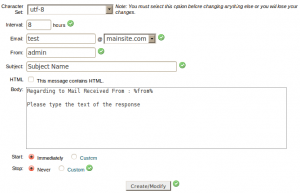
By clicking this you will get a section like below. You can customize auto responder in this section.
a) Choose a “character set” from the drop down list(You must select this option before changing anything else or you will lose your changes).
b) Specify the “Interval” (In hour),after this interval only auto responder reply to the same email address.
c) Define the email address whose mail you wish the system to respond to.
d) Enter your name or address in the “From” field.
e) Enter the subject line of the autoresponder in the “Subject” field.
f) Click the “HTML” checkbox, if you want to include HTML tags.
g) In the “Body” field, type the text of the response (Tags also be included).
h) Select a start time and stop time
Click “Create/Modify“ to store the new autoresponder.
With “Default Address” any e-mail that is sent to an unknown email account at your domain name can be automatically rerouted to a default e-mail account or discarded.
1) Click on the Default Address link in the Mail area.
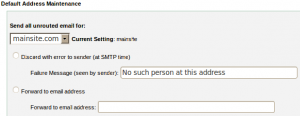
On Default Address Maintenance.
a) Select the domain for which you wish to set up a default address in the combobox “send all unrouted email for“.
b) Click one of the following options:
-
- Forward to email address — Enter the address in the text box.
- Discard with error to sender — Enter an error message for the sender to read.
c) Click the “Change” button.
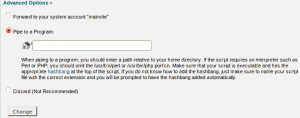
2) For additional option click on “Advanced Options”.
a) Click the option to “forward to your system account“
b) Forward message to a program : Define a path to the program.
c) Option button “Discard” : Discard incoming messages without an automatic response.
Click “Change” to save entire settings.
Spam Assassin is a mail filter installed on a mail server used to identify Spam, which will automatically filter mails to your domain .
1) To enable Spam Assassin, Click on “Spam Assassin” link in the Mail area.
Click on “Enable Spam Assassin”.
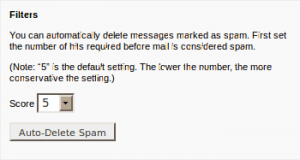
2) To delete spam mails automatically, click on “Auto-Delete Spam”.
Spam Assassin automatically deletes messages that meet or exceed the score limit.So
enabling this feature could cause you to lose email that is not spam,Spam Assasin must be configured properly for your account before using this feature.
3) To disable auto delete spam , click on “Disable Auto-Delete”.
5) To Enable the spam box, click on “Enable Spam Box”.
The spam mail will be sent to an additional folder named “spam”, so by preserving mail that may have mistakenly been filtered by Spam Assasin. To delete the messages in the spam box, click on “Clear Spam Box“.
6) For setting additional configuration, click on “Configure Spam Assasin”.
When you click “Configure Spam Assasin”
- Email can be blacklisted by adding email addresses in the “blacklist_from” text boxes.
- Set required score in the “required_score” text box.
- Set Individual test score in the “score” test box.
- Email can be whitelisted by adding email addresses in the “ whitelist_from” text boxes.
Click on “Save” to save entire setting.
Forwarders allow you to automatically forward e-mails from one account to other account.Forwarded mail will still be delivered to the original address as well.
1) To add forwarders, click on “Forwarders” in Mail.
2) To Add a New Forwarder, click on “Add Forwarder”.
By clicking this will gone to the section as seen below.
a) Enter the first part of the e-mail address that will be forwarded in the text box “Address to Forward“. Select the correct domain from the drop-down menu.
b) Type the address to which mail should be forwarded in the text box “.
c) Their is an other option “Discard with error to sender” to discard incoming messages and automatically send a failure notice to the sender . The subject of failure notice may entered in “Failure Message”.
c) For advanced forwarder options, click on “Advance Options“.
To forward mail to a system user : Type the appropriate username on the text box “Forward to a system account“.
Forward message to a program : Define a path to the program
Option button “Discard” : Discard incoming messages without sending a failure notice.
Click “Add Forwarder” to save entire settings.
3) To add an email domain forwarder, click on “Add Domain Forwarder”.
A mail sent to a domain can be forwarded to another domain by using email domain forwarders.
By clicking this will gone to the section as seen below.
a) Enter the domain to which you would like to forward email.
b) Click “Add Domain Forwarder”.
This howto will give you an idea on where you can get the IspCP account backup and how to restore your account with IspCP.
1) Backup of account
Daily backups must be enabled for your account by reseller so that you can get daily backups.
- Login with your FTP account
- Switch to backups/ directory
- Download the files stored in this directory
(usually named backup_YYYY_MM_DD.tar.bz2)
2) Restore an account
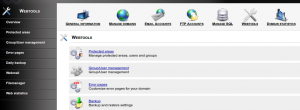
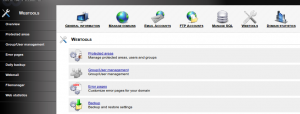
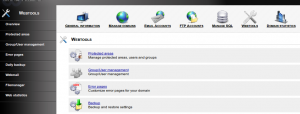
Login to the client control panel of account. Click on “Webtools”
Click on “Daily backup”
Clicking on “Restore” button will restore the account from the latest daily backup on backups/ directory.
The goal in enabling “Box Trapper” is to block emails that will not reply to the verification email.This means by using BoxTrapper any mail address that is not placed on your whitelist will be required to send back a verification email to ensure that they are not a spammer.
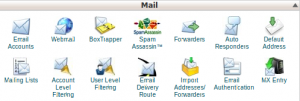
1) To Enable BoxTrapper, Click on “Box Trapper”.
Click on “manage” to enable / disable “Box Trapper”.
Click the ” Enable” button.
You can further change BoxTrapper settings with the options on the same page
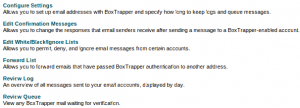
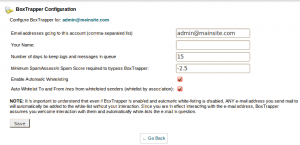
2) Box Trapper Configuration. click on “Configure Settings”
- Enter all addresses forwarding mail to this account into the “Email addresses”.
- And email account holder name in the “Your Name” text box.
- Enter the number of days to keep logs messages in queue.
- Set a SpamAssasin Score, all emails scoring above the specific score will be whitelisted and will bypass BoxTrapper
- Enable / Disable “Automatic White listing” using the appropriate check box.(If “Automatic White listing” is enabled,senders who successfully complete the verification process will not need to complete the verification process again when sending you email in the future.)
Click “Save” after entering all the information.
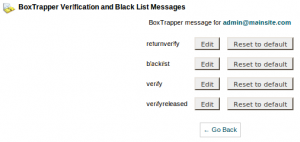
3) For Customizing Confirmation Messages, Click on Box “Edit Confirmation Messages”
Verification and blacklist messages can be customized by using this option.
- Select the button “Edit” to the list you would like to edit.
- Edit the Information(Do not edit subject between %, otherwise BoxTrapper will not function correctly).
- Click “Save” to save the corresponding message.
- Click the button “Reset to default” to set the message to default.
3) Manage White/Black/Ignore List. Click on “Edit White/Black/Ignore Lists”
You can create lists with specific subject or email address. Select the link to the list you would like to edit. Please note : (The list should contain one entry per line)
- White-list – Only allowed list of addresses and subject lines.
- Ignore-list – Only not allowed list of addresses and subject lines.
- Blacklist -Only not allowed list of addresses and subject lines (blacklisted content will also receive a warning message of your choice).
Click “Save” to save the corresponding message.
4) Click on “Forward Lists” on Box Trapper Configuration.
You can add forward white-listed email another email address also with this fuction.
Click Save when making changes to the list.
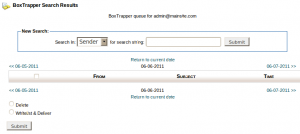
5) Click on “Review Log” on Box Trapper Configuration.
Through this interface you can view the Box Trapper log.
6) Click on “Review Queue” on Box Trapper Configuration.
Through this interface you can view any Box Trapper mail waiting for verification, you can manually view and approve messages.
This is a tutorial on managing email accounts with cPanel
1) Click on Email Accounts.
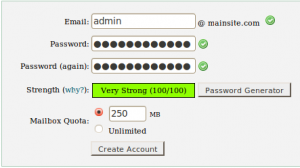
2) Add an Email address and password in the respective fields.
“Password Generator” can be used for generating a strong password.The password strength is shown in text box.You can set Quota for email accounts with “Mailbox Quota”.
Click on “Create Account”.
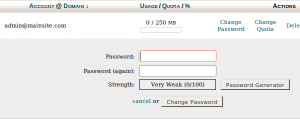
3)You can “Change Password” / “Mailbox Quota” or to “Delete” an email account with “Usage / Quota / %” field.
There is other two option in combo box “more” for Accessing Webmail and Configuring Email Client.
This is a howto/tutorial on creating password protected directories with IspCP.
Login to client area of the domain
1) Click on “Webtools”
2) Click on “Group/User management”
click on add user
Use the desired password and username on the respecitive feilds and click on “Add User”
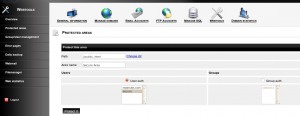
3) Click on “Protected areas”
Click on “Add new protected area”
On Path : you can set the directory which you want to protect
Area name : give a desired area name
Click on “Protect it”
You will be now asked for a login when browsing the selected directory with the url.
This is a tutorial/howto on managing Mysql databases with IsPCP
1) Click on “Manage SQL”
2) Click on “Add Sql Database”
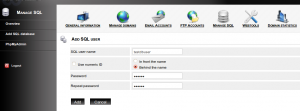
Use a desired database name and if you want to have the user id added with the database name check “Use numeric ID” box and enable the needed option
3) Click on “Add SQL user”
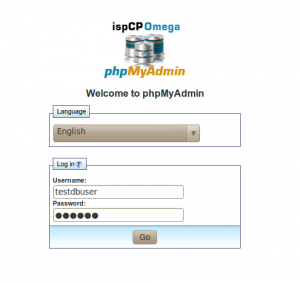
4) Managing database with Phpmyadmin
Click on the PhpMyAdmin or you can access it with the url http://admin.yourserver_name.com/pma/
Use database username and password to login to the phpmyadmin


