To access Directadmin control Panel : https://<domainname>:2222
You can use Import Addresses / Forwarders to create multiple email address or email forwarders. . Excel spreadsheet (.xls) or comma-separated values ( .cvs ) can be used to create mutiple email addresses/forwarders.
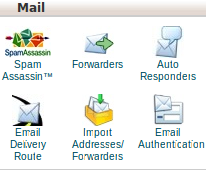
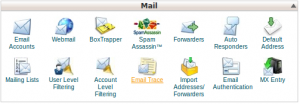
1) Click on the “Import Addresses / Forwarders”” in the Mail area.
By clicking this you will get a section like below.
Click any one option, whether you would like to import email accounts or forwarders.
To Import data Excel spreadsheet files (.xls) or comma-separated values sheet (.csv), browse the file path in the text box under step 2
Click on “Next” for importing the file.
The main purpose of Google APPS is ability to host mail service outside of your main domain and get full functionality of gmail services. To set up google MX as your mail server.
1. Log in to your cPanel account with the provided login credentials.
2. Under the Mail header click MX Entry in your cpanel.
3. Choose the domain for which you wish to use external email.
4. Three new sections will show up and under the Email Routing section you will want to select Remote Mail Exchanger.
5. Under the Add New Record section you will want to add your external mail server records.
For Google Apps you can see a list of servers at http://www.google.com/support/a/bin/answer.py?answer=174125
6. Once you have added your external MX Entries, you will want to make sure to remove any other entries.
Congratulations! You have successfully pointed MX records to your external mail provider. Keep in mind that changes to MX records may take up to 48 hours to take effect.
Kloxo is a light weight control panel that is ideal for a VPS. Here we can see how to do initial setup of Kloxo after installation.
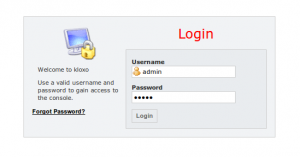
Login to Kloxo
Access Kloxo with https://my_server_ip:7777
You can use the below as login details when logging for the first time.
Username : admin
Password : admin
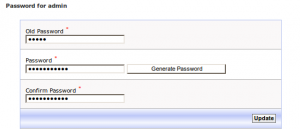
Change the admin password
On Old Password box use : admin
Generate a secure password by clicking on Generate Password.
Click on Update button to set the new password.
Configure Lxgaurd
On the warning message shown click on, Click here to configure Lxgaurd . You can also go to Lxgaurd settings by, Clicking on admin on left panel > Under Security section > Lxgaurd
Under the “Lxgaurd” tab you can set the number of wrong login attempts that should disable and block access to Kloxo.
You can also whitelist a specific IP with “White List” tab
Configure Mail settings
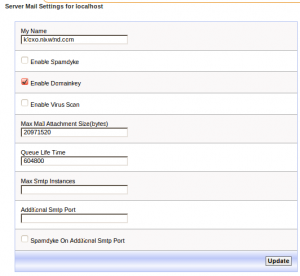
Configure basic mail settings of the server. Clicking on admin on left panel > Under Web -Mail – Database section > Server Mail Settings.
On My Name field – add the hostname of your server, please make sure that the hostname is resolving properly.
Click Update button to save the settings.
Create a DNS template.
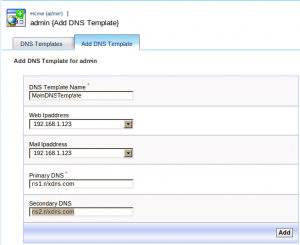
create a dns tempalate to create clients and domains, you can use this template settings as the DNS settings for the domains you add.
On
DNS Template Name : give a desired name for your template without spaces
Web IPaddress : select the IP address from the list to which you want to point the website.
Mail IPaddress : select the IP address from the list on which mail server is listening
Primary DNS : specify the first main nameserver
Secondary DNS : specify the second main nameserver
Click on Add to create DNS template.
Kloxo has been setup for use, you can now proceed and create plans and clients as mention on this post,
WordPress is one of the best CMS and blog engines available today, and you can used it to power anything from your personal site. But the great thing about WordPress is that you can either get a free hosted blog or you can download the software and run it on your own server for free. Many webhosts today offer scripts that make installing WordPress as easy as possible, so here we’re going to look at how you can install WordPress in only a few steps in cPanel with Softaculous. Installing WordPress manually isn’t too hard, but with Softaculous, it’s so easy anyone could do it.
This article will give you a step by step guide on how to install WordPress from your cPanel using Softaculous.
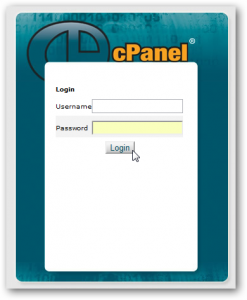
Step 1 : Login to your website’s admin panel to get started installing WordPress on your site. Usually, you can locate it at yourwebsite.com/cpanel or yourwebsite.com:2082.
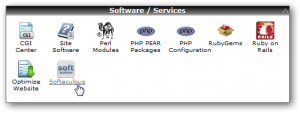
Step 2 : Scroll down to the Software/Services section, and click the Softaculous link.
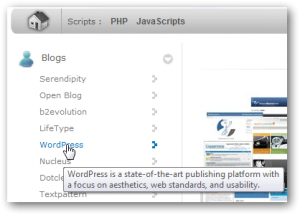
Step 3 : To install WordPress, click the WordPress link on the left-hand sidebar in Softaculous.
Step 4 : This page will give you some information about WordPress, including ratings and reviews from other users. Click the Install link above the header to start the installation.
Step 5 : Now you’ll need to enter some information about your site. Softaculous will automatically fill in default settings, but you may want to customize them.
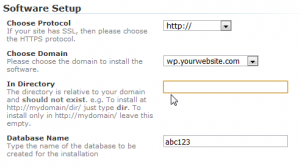
At the top of the page, you will have to select the domain where you wish to install WordPress. Select the directory to install WordPress on. By default, it will install to yourdomain.com/wp, but if you want yourdomain.com to go directly to WordPress, then leave this field blank.
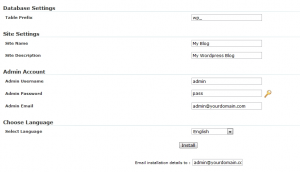
Step 6 : Now enter a name and description for your site, as well as an administrative username, password, and email. If you’d like a more secure password, click the key logo and a random generated password will be entered in the field.
If you’d like a record of your site’s settings, enter your email in the bottom field under the Install button. Finally, when you’re finished, click Install.
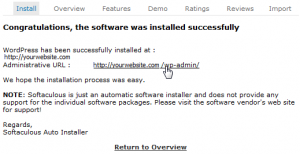
Step 7 : You will then get a confirmation page of your installation.
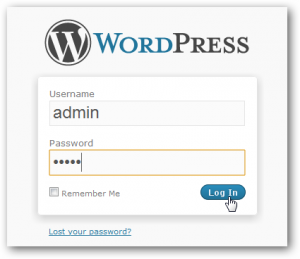
Step 8 : Click the link to go to the WordPress admin page, or simply browse to yourdomain.com/wp-login.php. You must now use the login name (username) and password that you had set during the installation.
Step 9 : The first time you login, WordPress may prompt you to change your password. Since you just choose the password for your site, this step is unnecessary. Click No Thanks, Do not remind me again to chose this notification.
Step 10 : Now you can add posts and pictures, change the theme, and customize the settings of your WordPress site directly from the WordPress Dashboard:
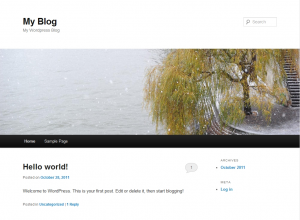
Step 11 : Here is new WordPress site after installing with Softaculous and submitting first post:
Parked Domains are often used by certain companies that want to have more than one web address for their official uses purposes.They will display the same website as your primary domain.
For example, if your primary domain is nixwind.com and it is the primary domain , you can able to set up windnix.com as a parked domain and it will load the content of nixwind.com. Hence the content of nixwind.com is loading in the browser, the address bar will display as http://windnix.com/.
Parked Domains allow you to “point” or “park” additional domain names to your existing hosting account main domain. Park domain will show the same content of your main domain.
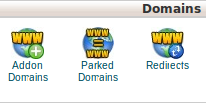
1) Click on the “Parked Domains” button on the home page under Domains.
2) Enter the domain you wish to park in the available text field.
Click ” Add Domain“, to add the Parked Domain.
3) Existed Parked Domain are listed under the “Remove Parked Domains”.
a) Click the link under ” Domain Root” that corresponds to the Parked domain, for viewing the file manager.
b) To Enable or Disable redirection of a parked domain , click on the link “Redirects to“.
Enter the url to which you would like to redirect the parked domain in the text box.
To disable the redirect, click the button “Disable Redirection“.
c) For deleting a parked domain , click the “Remove” link corresponding to the parked domain .
If you have a VPS server it is always good to have a very thin control panel which will not create resource overhead. Webmin minimal, is such an ideal thin control panel. Here we can see how we can build a hosting environment with webmin-minimal and other softwares from source.
Initial Control panel setup and Firewall Installation.
We are using a fresh centos VPS. Login to the VPS as root user
1) Webmin Minimal Installation
We must install the minimal version of webmin, replace X.xxx with the webmin version you download.
# cd /usr/local/src/

# wget http://prdownloads.sourceforge.net/webadmin/webmin-X.xxx-minimal.tar.gz

# tar -zxvf webmin-X.xxx-minimal.tar.gz

# cd webmin-X.xxx/

# ./setup.sh
You will be prompted with the below questions, you can use default values itself . Please use a good password.
Config file directory [/etc/webmin]:
Log file directory [/var/webmin]:
Full path to perl (default /usr/bin/perl):
Web server port (default 10000):
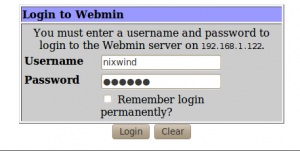
Login name (default admin): nixwind
Login password:
Password again:
Start Webmin at boot time (y/n): y
Make sure that firwewall is disabled ( temporarily, we will be installing CSF later in this article) .
# /etc/init.d/iptables stop
You can access webmin with
http://server_ip:10000
Username and Password you have given during installation
2) Install a Theme ( Optional )
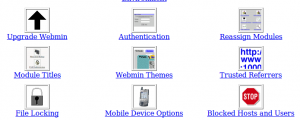
I’m going to use Vitualmin Framed theme. To Install a theme, click on Webmin Configuration
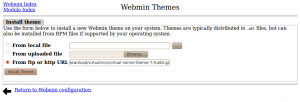
On Webmin Themes menu, select From ftp or http url and specific the exact theme file there.
VirtualMin Framed Theme url : http://download.webmin.com/download/virtualmin/virtual-server-theme-X.x.wbt.gz
Click on Install Theme
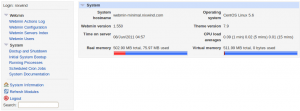
Then go to Webmin Themes again and select VirtualMin Framed Theme as current theme.
Click on Change, that’s all
3) Install Config Server Firewall for firewall management with Webmin.
Install CSF
Login to server as root and execute the below commands.
# cd /usr/src/

# wget http://www.configserver.com/free/csf.tgz

# tar -zxvf csf.tgz

# cd csf/

# sh install.sh
Install Webmin module of CSF
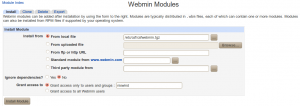
Select Webmin Configuration from left menu and click on Webmin Modules
Select Install From local file and specific path as /etc/csf/csfwebmin.tgz
Click on “Install Module”
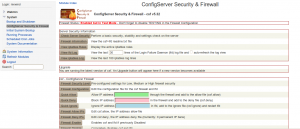
You need to configure CSF, Find it on Webmin under System >> ConfigServer Security & Firewall
Configure firewall with, Firewall Configuration and Check Server Security . Disable testing mode after properly configuring the firewall.
Kloxo is an ideal control panel for VPS with it’s smaller memory footprint. Here we can see how we can install Kloxo on a Centos 5 sever.
1) Login as root into the server
2) Configure Firewall to access Kloxo
Open Ports 7777 & 7778 on Firewall and disable SElinux.
# iptables -A INPUT -p tcp --dport 7777 -j ACCEPT

# iptables -A INPUT -p tcp --dport 7778 -j ACCEPT

# setenforce 0
3) Set a hostname for the server
# hostname kloxo.example.com
To make the change permanent add the below line on /etc/sysconfig/network file
HOSTNAME=kloxo.example.com
3) Install Kloxo
# yum install -y wget

# cd  /usr/local/src

# wget http://download.lxcenter.org/download/kloxo/production/kloxo-install-master.sh

# sh ./kloxo-install-master.sh
4) Login
Url : https://your_server_ip:7778
Username : admin
Password : admin
You can use the above details to login to Kloxo for the first time,
Please see this article for howto setup Kloxo after installation.
MySQL Database Wizard can be used to set up MySQL database, create database user and assign needed privileges. A MySQL Databases allow you to store lots of information in an easy to access manner.
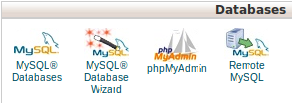
1) Click on the “MySQL database Wizard” button on the home page under Databases.
2) To set up a MySQL database,
a) Enter a name for the database in the text box ” New Database”.
b) Click the button “Next Step”.
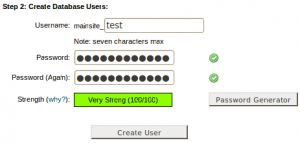
3) On Next step Create user , who have access to the new database.
a) Enter a name for the user allowed to manage the database in the text box “Username”.
b) Enter a strong password for the user to login or use “Password Generator” to generate a strong password.
c) Click ” Create User” to create the new MySQL user.
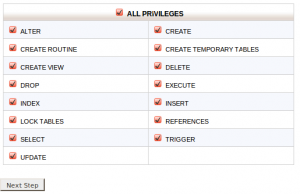
3) The next step is to give privileges to the user.
a) Select the privileges you wish to grant the user.
b) For full privilege click the check box ” ALL PRIVILEGES”.
c) Click “Next Step” to save the privileges.
You will get a message stating that the database and user account were successfully set up. The page will also have the following options.
- Add another database – To Create a New Database.
- Add another user for your MySQL Database – To add additional user for the created database.
- Return to Home – To go to home screen of cPanel.
The Index Manager allows you to customize the way a directory will be viewed on
the web.
1) Click on the Index Manager button on the home page.
2) Click on the name of the directory you wish to change the indexing options.
3) Click on the radio button next to the option that you want to use for this folder.
Default System Setting – The default defined by your web host will be used.
No Indexing – The contents of the directory are not listed.
Standard Indexing (filename only) – Contents appear only as filenames.
Fancy Indexing (filename and description) – Information about the files, such as the size and time last modified, appear.
Click ” Save”, to save the entire setting.


