Kloxo is a light weight control panel that is ideal for a VPS. Here we can see how to do initial setup of Kloxo after installation.
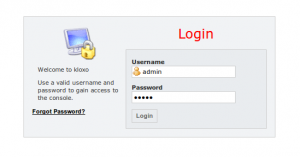
Login to Kloxo
Access Kloxo with https://my_server_ip:7777
You can use the below as login details when logging for the first time.
Username : admin
Password : admin
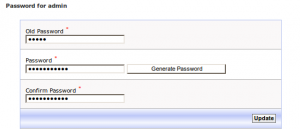
Change the admin password
On Old Password box use : admin
Generate a secure password by clicking on Generate Password.
Click on Update button to set the new password.
Configure Lxgaurd
On the warning message shown click on, Click here to configure Lxgaurd . You can also go to Lxgaurd settings by, Clicking on admin on left panel > Under Security section > Lxgaurd
Under the “Lxgaurd” tab you can set the number of wrong login attempts that should disable and block access to Kloxo.
You can also whitelist a specific IP with “White List” tab
Configure Mail settings
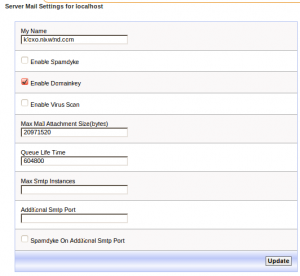
Configure basic mail settings of the server. Clicking on admin on left panel > Under Web -Mail – Database section > Server Mail Settings.
On My Name field – add the hostname of your server, please make sure that the hostname is resolving properly.
Click Update button to save the settings.
Create a DNS template.
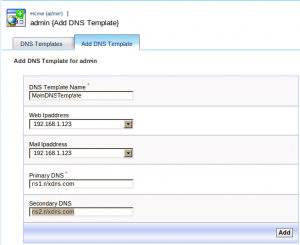
create a dns tempalate to create clients and domains, you can use this template settings as the DNS settings for the domains you add.
On
DNS Template Name : give a desired name for your template without spaces
Web IPaddress : select the IP address from the list to which you want to point the website.
Mail IPaddress : select the IP address from the list on which mail server is listening
Primary DNS : specify the first main nameserver
Secondary DNS : specify the second main nameserver
Click on Add to create DNS template.
Kloxo has been setup for use, you can now proceed and create plans and clients as mention on this post,
Kloxo is an ideal control panel for VPS with it’s smaller memory footprint. Here we can see how we can install Kloxo on a Centos 5 sever.
1) Login as root into the server
2) Configure Firewall to access Kloxo
Open Ports 7777 & 7778 on Firewall and disable SElinux.
# iptables -A INPUT -p tcp --dport 7777 -j ACCEPT

# iptables -A INPUT -p tcp --dport 7778 -j ACCEPT

# setenforce 0
3) Set a hostname for the server
# hostname kloxo.example.com
To make the change permanent add the below line on /etc/sysconfig/network file
HOSTNAME=kloxo.example.com
3) Install Kloxo
# yum install -y wget

# cd  /usr/local/src

# wget http://download.lxcenter.org/download/kloxo/production/kloxo-install-master.sh

# sh ./kloxo-install-master.sh
4) Login
Url : https://your_server_ip:7778
Username : admin
Password : admin
You can use the above details to login to Kloxo for the first time,
Please see this article for howto setup Kloxo after installation.


