MIME types tell browsers how to handle specific extensions. Adding MIME types is useful for enabling visitors’ browsers to handle new technologies as they come out.
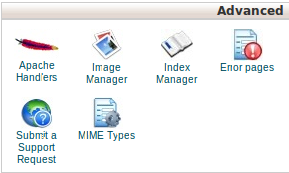
1) Click on the MIME Types button on the home page.
2) To add a MIME type
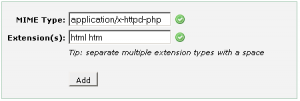
a) Enter the name of the file type’s handler into the text box “Mime Type” .
b) Enter the file extension, separate each entry with a space in the text box “Extension(s)” started with a dot (“.”).
3) Existing MIME Types are listed under “User Defined MIME Types”.
Click on the Remove button of appropriate handler to delete an existing MIME Types.
Here is an example of the cPanel interface.
The above example tells Apache to treat my .html and .htm files as PHP files. This is helpful if your .html files have PHP code inside, but you cannot rename the files to the .php extension
Apache handlers tells the server how to handle files having specific extension. Apache handlers control how your site’s Apache web server software manages certain file types and file extensions.
You can configure Apache to handle a new file type with the help of “Apache handlers” on cPanel.
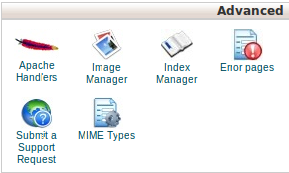
1) Click on the Apache handlers button on the home page.
2) To add an Apache handler
a) Enter the handler name into the text box “Handler”.
b) Enter the file extension, separate each entry with a space in the text box “Extension(s)” started with a dot (“.”).
c) Click “Add” to add the new appache handler.
3) Existing user-defined handler are seen under “User Defined Apache Handlers”
a) Click on the Remove button of appropriate handler to delete an existing handler.
The file extension automatically supported by the Apache server are seen under “System Apache Handlers”
You can use cPanel to set the cronjobs for your application or any other task. Cron jobs are scheduled tasks that take place at predefined times or intervals on the server.
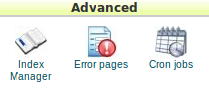
1) Click on the Cron jobs button on the home page.
2) The first one is for adding a cron email.
Cron Email is used to send notifications whenever your cron jobs are run.
a) Enter the email address at which you wish to receive the notifications in the text box “Email“.
b) Click the “Update Email” button.
3) To set up a cron job
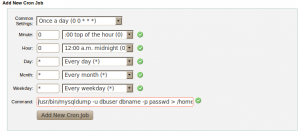
Configure any interval at which you wish to run the cron job
a) Common Settings– The First menu allows you to select a commonly used interval without having to specify settings for the minute, hour, day, month.
b) Minute – Select the number of minutes between running the cron job, or the minute each hour on which you wish to run the cron job.
c) Hour – Select the number of hours between running the cron job, or the hour each day on which you wish to run the cron job.
d) Day – Select the number of days between running the cron job, or the day of the month on which you wish to run the cron job.
e) Month – Select the number of months between running the cron job, or the month of the year in which you wish to run the cron job.
f) Weekday – select the day or days of the week on which you wish to run the cron job.
Type the command you wish the system to run in the text box “Command”.
The current cron jobs are listed under “Current Cron Jobs”.
4) You can edit / delete the current cron jobs.
a) To edit a current cron job.
Locate the cron job and click “Edit”.
Edit the settings you wish to change.
Click “Edit Line” to save the edited cron job.
b) To delete a current cron job.
Click “ Delete” in corresponding cron job that you want to delete.
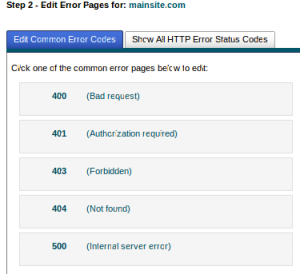
With cPanel, you can create customized error pages for 400, 401,403, 404, 500 errors. An error page informs a visitor when there is a problem accessing your site.
1) Click on the Error pages button on the home page.
2) Select a domain from the combo box “Managing” to manage the error pages.
3) Click the error code for the page you wish to edit.
For more error code click on the tab ” Show All HTTP Error Status Codes” .
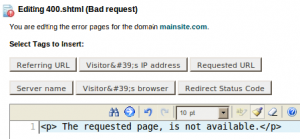
4) Enter the HTML code for the error page. You can use the buttons at the top of the page to insert variables into the displayed code.
Click “Save” to save the HTML code for the error page.
Redirects allow you to make a specific web page redirect to another page and display the contents of that page.
1) Click on the Redirects button on the home page.
2) To add a new Redirect
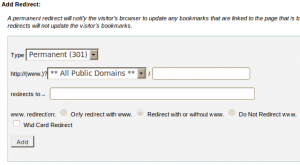
a) Select the type of redirection needed, either temporary or permanent from the combo box “Type”.
b) Enter the URL you would like to redirect in the combo box and corresponding text box “http://(www.)?”.
c) Enter the URL to which you would like to redirect users in the “redirects to” text box .(Specify a address with a protocol ie, http://, https:// or ftp:// ) .
d) Select any one of the option listed below.
Only redirect with www – Only users who type “www” in front of the page name will be redirected.
Redirect with or without www – Redirect all users regardless of whether the “www” prefix is included with the URL.
Do Not Redirect www – users who type ” www” with the URL will not be redirected.
e) Click the check box ““, to redirect all files to the same filename in the redirected URL.
f) Click the button “Add” to add the new redirects.
You may test the redirect by clicking the link under ” Directory “ in the Current Redirects.
a) Click the corresponding redirect link under remove, to remove a redirect.
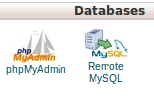
Remote MySQL option is to allow an external web server to access your MySQL databases.
1) Click on the “Remote MySQL” in the home screen under Databases.
2) To allow a remote server to access your databases
a) Type the host’s name or IP address into the text field “(% = wildcard , with % all external servers will be able to access your databases )”.
b) Click on “Add Host” to add a specified host to access the MySQL databases.
3) To disallow a host from accessing databases on your server.
Click the button below Remove of the corresponding host’s name or IP address.
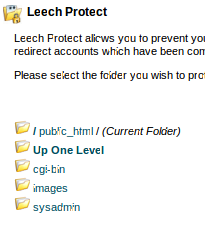
Leech Protect allows you to prevent users from publicly posting their password to a restricted area of your site. If an user A is given access to a restricted area and he passes the login to user B and user C with different IP’s , leech protect will detect this and block these IP’s. It also can prevent people from attempting to guess a user’s password through repeated guesses.
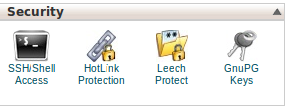
1) To protect your website from leeching, click on the “Leech Protect” on the home screen under Security.
2) Select the folder you wish to protect by clicking on its name.
3) Enter the number of times a user may login to this folder during a 2 hour period in the text box “Number of Logins Per Username Allowed in a 2-Hour Period”.
4) Enter the web address of a site you wish to send users to who violate the
maximum number of logins.
5) For enabling email alerts, click on the check box near “Send Email Alert To”.
Enter the email address which the email alerts wants to be sent in the text box near “Send Email Alert To”.
6) Click the “Disable Compromised Accounts” checkbox for disabling an account that exceeds the maximum number of logins in 2 hours .
7) Click on Enable button to enable leech protection.
Click on Disable button to disable leech protection.
8) There is a “Manage Users” button, clicking this button takes you to the “Password Protect Directories” where you can add,edit or delete an user.
Parked Domains allow you to “point” or “park” additional domain names to your existing hosting account main domain. Park domain will show the same content of your main domain.
1) Click on the “Parked Domains” button on the home page under Domains.
2) Enter the domain you wish to park in the available text field.
Click ” Add Domain“, to add the Parked Domain.
3) Existed Parked Domain are listed under the “Remove Parked Domains”.
a) Click the link under ” Domain Root” that corresponds to the Parked domain, for viewing the file manager.
b) To Enable or Disable redirection of a parked domain , click on the link “Redirects to“.
Enter the url to which you would like to redirect the parked domain in the text box.
To disable the redirect, click the button “Disable Redirection“.
c) For deleting a parked domain , click the “Remove” link corresponding to the parked domain .
Addon domains are a way of creating separate domain within your master account. Addon domain will act as separate domain and you can manage it with the same main domain control panel.
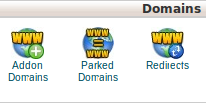
1) Click on the Addon Domains button on the home page.
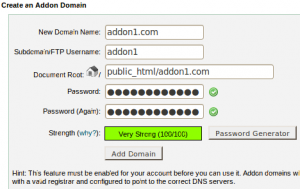
2) To add an addon domain
a) Enter the addon domain name in the “New Addon Domain” text box.
b) Enter the main FTP username for the addon domain in the ” Subdomain/Ftp Username” field.
c) Enter the directory that will contain the addon domain’s files in the text box ” Document Root“.
d) Enter the password for the addon domain in the “Password” field or use “Password Generator” to generate a strong password.
e) Click “Add Domain” to save the new addon.
3) Existed Addon Domain are listed under the “Modify a Addon Domain“.
a) Click the link under ” Document Root” that corresponds to the addon domain, for viewing the file manager.
b) To Enable or Disable addon domain Redirection, click on the link ” Redirects to”.
Enter the link you would like to redirect the addon domain in the text box.
To disable the redirect, click the button “Disable Redirection“.
c) For deleting a addon domain , click the “Remove” link corresponding to the addon domain .
A Subdomain is a domain using your main domain and a prefix name. A subdomain is a domain that is part of a larger domain, for example blog.example.com is the subdomain of example.com
1) Click on the Subdomains button on the home page under the section “Domains”.
2) To create a subdomain
a) Enter the prefix for the subdomain in the text box “Subdomain“.
b) Select the desired main domain from the combo box.
c) Enter the home directory for the subdomain in the text box “Document Root“, you must upload the subdomains files to this directory.
d) Click the button “Create” to add the subdomain.
3) Existing subdomains are listed under the “Modify a Subdomain”.
a) Click the link under ” Document Root” that corresponds to the subdomain, for viewing the file manager.
b) To Enable or Disable Subdomain Redirection, click on the link ‘”Manage Redirection”.
Enter the url to which you would like to redirect the subdomain in the text box.
To disable the redirect, click the button “Disable Redirection“.
c) For deleting a sub domain, click the “Remove“ link corresponding to the subdomain.


