This is a tutorial/howto on using filemanager with IspCP
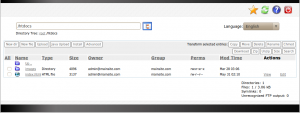
IspCP uses a filemanager called net2ftp, ftp login details are used to login to the file manager.
1) Create a FTP account
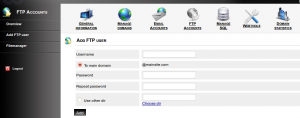
click on “FTP Accounts”
Click on “Add FTP user”
Use desired username and password in the respective fields. If you want to create an account with access to a specific subdirectory not main dir in the account, enable “Use other dir” and chose the dir by clicking on “Choose dir” link.
2) Click on Filemanager
You can also access filemanager with http://admin.your_server.com/tools/filemanager/
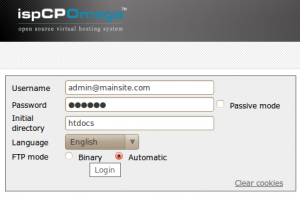
Use the FTP account login details you created to login, you can also go directly to a subdirectory by specifying it on “Initial directory”. Click login
This is a tutorial/howto on managing email account with IspCP
Click on “Email Accounts”
1) Add Email account
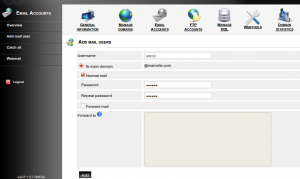
Click on “add mail user”
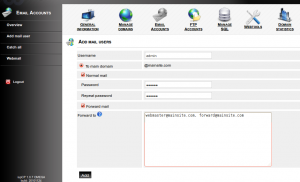
You can set the email username and password there, then click on add
2) Forward email account
Click on “add mail user”
Set the email username and password on respective fields. Enable “Forward mail” and you can set the email address to which the forwarding must be done on the next box. Multiple email address can be set separated by comma.
Click on add
2) Create a catch all email account
Catch all account is an email account that is used to route all the main to non existing email address of a domain.
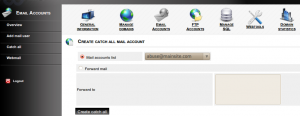
Click on catch all, you can select email account to set as catch all from the ”
This is a tutorial/howto on managing email account with IspCP
Click on “Email Accounts”
1) Add Email account
Click on “add mail user”
You can set the email username and password there, then click on add
2) Forward email account
Click on “add mail user”
Set the email username and password on respective fields. Enable “Forward mail” and you can set the email address to which the forwarding must be done on the next box. Multiple email address can be set separated by comma.
Click on add
2) Create a catch all email account
Catch all account is an email account that is used to route all the main to non existing email address of a domain.
Click on Catch all. You can select the email address to be set as catch all from the list “Mail accounts list” or set a different on by selecting “
Click on “Create catch all”
Click on webmail to access the webbased email client.
This is a tutorial/howto on adding a subdomain with IspCP
Login to your IspCP control panel as a client
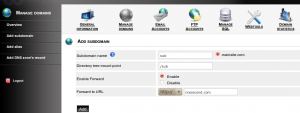
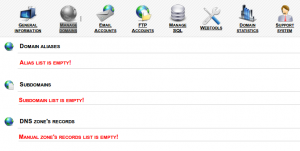
1) Click on “Manage domains” on the top panel
2) Click on add subdomain
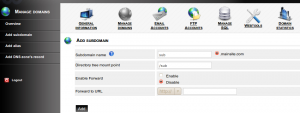
* Subdomain name :: Give the subdomain name
* Directory tree mount point :: by default it will be same as subdomain name, you can change it if you want to point the subdomain to another dir
Click on add button at the bottom to add the subdomain
3) Add a redirect / Forwarder for a subdomain
* Subdomain name :: Give the subdomain name
* Enable Forward :: enable it
* Forward to URL :: give the url to which you want to forward the subdomain
Click on add button at the bottom to add the subdomain and create the redirect.
A short tutorial on creating domain alias with IspCP omega. Using Domain alias you will be able to,
- Park a newsite on your main site , ie mainsite.com and newsite.com will give you same content.
- Add a new site to your control panel, ie newsite.com will have separate home directory and will display different content.
- Redirect or forward a new site, ie newsite.com can be forwarded to google.com
Login to client area of IspCP omega
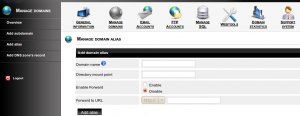
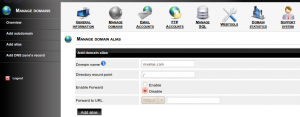
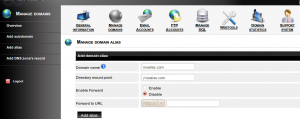
2) Click on “Add alias” on right panel
To Park a domain
* On Domain name feild -add the domain you want to park
* On Directory mount point – /
* Enable Forward – Set as Disable
Click on Add alias button on bottom to park the domain on mainsite.
* On Domain name field – The domain you want to add
* On Directory mount point – Enter the domain name
* Enable Forward – Set as Disable
Click on Add alias button on bottom add the new domain, upload contents to /mainsite.com/newsite.com/htdocs/
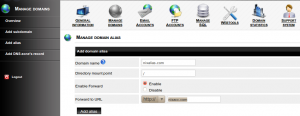
* On Domain name field -add the domain you want to park
* On Directory mount point – /
* Enable Forward – Set as Enable
* Forward to URL – Set the url to which you want to forward
Click Add alias button on bottom to add the Forwarder/Redirect
Overview
Installing trac on a server with Apache and mod_python
Requirements
Tested with the below ,
Apache 2.2
Mysql 5.0
Objective
Installing trac and apache module mod_python for a project system on a domain subdirectory
Configuration
Step 1
Make sure that you have the required version of python , flew, setuptools and mysql-python installed.
This installation was done on a DirectAdmin server and it had python version as Python 2.4.3, so had to install a secondary python of version 2.5 on a different location
To install python 2.5
root@serv:~# cd /usr/local/src
root@serv:~# mkdir -p /usr/local/TRAC/PYTHON/
root@serv:~# wget http://www.python.org/ftp/python/2.5/Python-2.5.tgz
root@serv:~# tar -zxvf Python-2.5.tgz
root@serv:~# cd Python-2.5
root@serv:~# ./configure –enable-shared –prefix=/usr/local/TRAC/PYTHON/
root@serv:~# make
root@serv:~# make install
To install flex 2.5
root@serv:~# cd /usr/local/src
root@serv:~# wget http://sourceforge.net/projects/flex/files/flex/flex-2.5.35/flex-2.5.35.tar.gz/download?use_mirror=biznetnetworks
root@serv:~# tar -zxvf flex-2.5.35.tar.gz
root@serv:~# cd flex-2.5.35
root@serv:~# ./configure
root@serv:~# make
root@serv:~# make install
To install setup tools
root@serv:~# cd /usr/local/src
root@serv:~# wget http://peak.telecommunity.com/dist/ez_setup.py
root@serv:~# /usr/local/TRAC/PYTHON/bin/python ez_setup.py
To install mysql-python
root@serv:~# cd /usr/local/src
root@serv:~# wget http://sourceforge.net/projects/mysql-python/files/mysql-python/1.2.3/MySQL-python-1.2.3.tar.gz/download?use_mirror=biznetnetworks
root@serv:~# tar -zxvf MySQL-python-1.2.3.tar.gz
root@serv:~# cd MySQL-python-1.2.3
root@serv:~# /usr/local/TRAC/PYTHON/bin/python ./setup.py install
Step 2
Linking the libraries
As you have installed the python to a custom location you have to link the libraries so as properly compile the mod_python
root@serv:~# echo “/usr/local/TRAC/PYTHON/lib/” > /etc/ld.so.conf.d/python2.5.conf
root@serv:~# ldconfig -v
Step 3
Installing trac
root@serv:~# cd /usr/local/src
root@serv:~# wget http://ftp.edgewall.com/pub/trac/Trac-0.12.1.tar.gz
root@serv:~# tar -zxvf Trac-0.12.1.tar.gz
root@serv:~# cd Trac-0.12.1/
root@serv:~# /usr/local/TRAC/PYTHON/bin/python setup.py install
Step 4
Installing mod_python and loading the module
Please note to give the apxs and python binary path correctly according to the installed location.
root@serv:~# wget http://www.ecoficial.com/apachemirror//httpd/modpython/mod_python-3.3.1.tgz
root@serv:~# tar -zxvf mod_python-3.3.1.tgz
root@serv:~# cd mod_python-3.3.1/
root@serv:~# ./configure –with-apxs=/usr/sbin/apxs –with-python=/usr/local/TRAC/PYTHON/bin/python
root@serv:~# make
root@serv:~# make install
Please make sure that the module is loaded on the proper file which is included in apache conf or you can load the module directly in the main conf file ( httpd.conf )
root@serv:~# echo “LoadModule python_module /usr/lib/apache/mod_python.so” > /etc/httpd/conf/extra/httpd-python.conf
Step 5
Creating a project
Create a mysql db/db_user and grant all privileges to the database with a password
root@serv:~# /usr/local/TRAC/PYTHON/bin/trac-admin /var/project initenv desired_projectname mysql://db_user:db_pass@localhost:3306/db_name
Step 6
Setting up a Login
Limit the access with a login
root@serv:~# htpasswd -c /var/project/ .htpasswd admin
Step 7
Setup the VirtualHost
Open your Apache VirtualHost file and add the below lines into it
<Location /project>
RewriteEngine Off ### to override any redirect rules on .htaccess of parent directory
SetHandler mod_python
PythonInterpreter main_interpreter
PythonHandler trac.web.modpython_frontend
PythonOption TracEnv /var/project
PythonOption TracUriRoot /project
AuthType Basic
AuthName “Trac”
AuthUserFile /var/project/.htpasswd
Require valid-user
</Location>
You will be able to access the project trac now using
http://your_domain.com/project
Overview
A how to for doing DirectAdmin to DirectAdmin server migration. This can assist you on complete account migration from Oldserver to Newserver , with rsync, sysbackup and manual restoration.
Requirements
- Basic idea of DireactAdmin files and directories
- You must have a new server with DirectAdmin Licensed and installed
- You must make sure that the version of Apache, php and mysql installed on both servers matches
Migration
DirectAdmin does have a utility called System Backup to backup all the needed configuration files and directories in the server, but unfortunately it doesn’t come with a restoration tool. So we will have to do it in the manual way. Home directories will be synced and mysql databases will be backedup and restored separately.
Step 1
Run System Backup on the old server.
Admin Tools >> System Backup
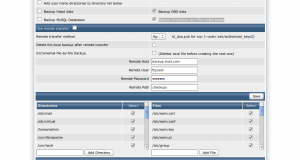
We will be backuping home directories and mysql db’s manually so Uncheck and unselect the following options on System Backup
Add user home directories to directory list below
Backup httpd data
Backup MySQL Databases
Check and Select
Backup DNS data
Backup Directories and Files listed below
All directories/files listed in bottom section of the System Backup
now click on the Run System Backup Now icon . The backup will be stored mostly in /home/backup ( it will depend upon how you have set it in DA )
Step 2
rsync the system backup to the Newserver.
root@old:~# rsync -avurz -e ssh –delete /home/backup root@Newserver_IP:/home/backup
Step 3
On the Newserver restore the system backups one by one manually.
For example, for restoring your /etc/virtual directory,
root@new:~# cd /etc
root@new:~# tar xvzfp /home/backup/<backup_date>/custom/etc/virtual.tar.gz
Please check here for the complete paths and files used on a DirectAdmin system.
( Do take extra care while restoring /etc/passwd /etc/shadow /etc/group etc.. )
Step 4
Synchronise the home directory
root@old:~# rsync -avurz -e ssh –delete /home root@Newserver_IP:/home
Step 5
Backup and restore the mysql DB’s
On Oldserver
root@old:~# cat /usr/local/directadmin/conf/mysql.conf
Get the da_admin password from the above file
root@old:~# mysqldump -u da_admin -p –all-databases > /root/all_databases.sql
root@old:~# scp /root/all_databases.sql root@Newserver_IP:/root
On Newserver
root@new:~# cat /usr/local/directadmin/conf/mysql.conf
root@new:~# mysql -u da_admin -p < /root/all_databases.sql
Step 6
Use the ipswap script to change the Oldserver IP’s
root@new:~# cd /usr/local/direactadmin/scripts/
root@new:~# ./ipswap.sh Oldserver_IP Newserver_IP
Step 7
Update the nameservers to the Newserver IP’s.
Step 8
To resolve all the queries correctly to the new server . You will have to setup the multi server dns clustering on the new server
Multi Server Setup
on, Add Remote Server
Input the Oldserver IP , login : admin and password
IP:
Port:
SSL:
Username:
Password:
Click Add
next on, List of External Servers
| Zone Transfer: | |
| Domain Check: |
select the server
Click connections “Test Connection(s)” to check the connection.
If the test runs OK, Turn Multi Server On on the top
and run the below to sync the zone files
root@new:~# echo “action=rewrite&value=named” >> /usr/local/directadmin/data/task.queue
Now you’ll be able to access the domains from the new server , do tail the logs to see if everything is fine 🙂


