Adding an FTP account will allow users to access the domain’s folder on the server’s hard disk.
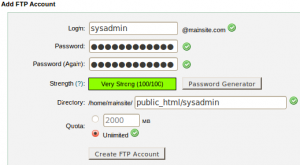
1) For creating FTP accounts, click “FTP Accounts” in the “File” area.
2) To create a FTP account
a) Enter a username in the text box “Login“.
b) In the Password box, type the account’s password or generate a strong password by clicking the “Password Generator” button.
c) Enter the path to the “Directory” to which this FTP account has access.
d) Disk space that will be allocated to the FTP account can be set in “Quota” field.
e) Click Create FTP Account.
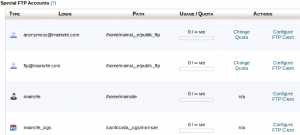
3) The new FTP account should be now displayed in the list below.
By Clicking the links we can change a password,Adjust quota,Delete an account or Configure an FTP client of an existing FTP Account.
4) Special FTP Accounts are seen under “Special FTP Accounts”.
Special FTP Accounts are FTP accounts that cannot be deleted.
This is a tutorial/howto on using filemanager with IspCP
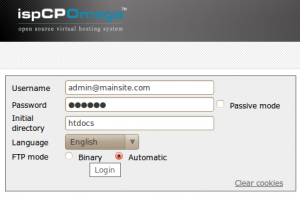
IspCP uses a filemanager called net2ftp, ftp login details are used to login to the file manager.
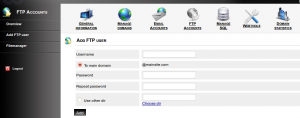
1) Create a FTP account
click on “FTP Accounts”
Click on “Add FTP user”
Use desired username and password in the respective fields. If you want to create an account with access to a specific subdirectory not main dir in the account, enable “Use other dir” and chose the dir by clicking on “Choose dir” link.
2) Click on Filemanager
You can also access filemanager with http://admin.your_server.com/tools/filemanager/
Use the FTP account login details you created to login, you can also go directly to a subdirectory by specifying it on “Initial directory”. Click login


