Awstats Installation

Awstats is an advanced graphical statistics software that can be used to analyze the webserver logs. Here we can see how we can install awstats on a linux server with Apache.

Installation

You can get the latest awstats from here. Login to server as root execute the below commands

# cd  /usr/local/
# wget http://sourceforge.net/projects/awstats/files/AWStats/7.0/awstats-7.0.tar.gz
# tar -zxvf awstats-7.0.tar.gz
# mv /usr/local/awstats-7.0 /usr/local/awstats
# cd /usr/local/awstats/tools/
# perl awstats_configure.pl

The above script will ask few questions, detect/modify your apache configuration and will generate an awstats configuration file for the site you specifies.

Configuration

Awstats site configuration file path will be :  /etc/awstats/
Name Format of configuration file : awstats.yoursite.com.conf

Open the configuration file with a desired text editor and check, verify and modify the below entries

LogFile —> Log file directive should mention the correct path of the site access log file
SiteDomain —> this directive should mention your domain name

Updating stats

You can update stats with the below command
# /usr/local/awstats/wwwroot/cgi-bin/awstats.pl -update -config=yoursite.com

Add it as a cron to generate the statistics periodically

# crontab -e

0 0 * * * /usr/local/awstats/wwwroot/cgi-bin/awstats.pl -update -config=yoursite.com >/dev/null 2>&1

Securing

To restrict access and to password protect the statistic information add the below lines in your apache configuration

<Files “awstats.pl”>
AuthUserFile /usr/local/awstats/.htpasswd
AuthGroupFile /path/to/.group
AuthName “Restricted Area”
AuthType Basic
require valid-user
</Files>

You need to create a user and password and copy it to the file /usr/local/awstats/.htpasswd to limit the access. Any htpasswd online generator can be used for this, You can find an example one here

restart Apache

/etc/init.d/httpd restart

Accessing

Awstats of the domain can be viewed with the url,

http://your_server_ip/awstats/awstats.pl??config=yoursite.com

Memcached Installation

Memcached is a general-purpose distributed memory caching system. It can be used to speed up dynamic database-driven websites by caching data and objects in RAM to reduce the number of times database must be read.

Please make sure that Memcached port is opened and access is allowed only to desired servers. If the memcached port is left open to all any one can connect to it and access the data objects.

1) Install libevent

libevent is required to install memcached

# yum install libevent-devel libevent

2) Install memcached

# cd /usr/local/src
# wget http://memcached.googlecode.com/files/memcached-1.4.5.tar.gz
# tar -zxvf memcached*
# cd memcached*
# ./configure
# make
# make install

3) Run memcached as a daemon and make it listen on default port

Create a user,
# useradd memcache

Use the below command to run memcached
# memcached -u memcache -p 11211 &

To use memcahe with PHP on the same server , you can install it with

# pecl install memcache

Make sure that below line is added to main php.ini
extension=memcache.so
To load the module and reflect the changes restart  apache

# /usr/local/apache/bin/apachectl restart

Minimal hosting control panel with Webmin

If you have a VPS server it is always good to have a very thin control panel which will not create resource overhead. Webmin minimal, is such an ideal thin control panel. Here we can see how we can build a hosting environment with webmin-minimal and other  softwares from source.

Initial Control panel setup and Firewall Installation.

We are using a fresh centos VPS. Login to the VPS as root user

1) Webmin Minimal Installation

We must install the minimal version of webmin, replace X.xxx with the webmin version you download.

# cd /usr/local/src/
# wget http://prdownloads.sourceforge.net/webadmin/webmin-X.xxx-minimal.tar.gz
# tar -zxvf webmin-X.xxx-minimal.tar.gz
# cd webmin-X.xxx/
# ./setup.sh

You will be prompted with the below questions, you can use default values itself . Please use a good password.

Config file directory [/etc/webmin]:
Log file directory [/var/webmin]:
Full path to perl (default /usr/bin/perl):
Web server port (default 10000):
Login name (default admin): nixwind
Login password:
Password again:
Start Webmin at boot time (y/n): y

Make sure that firwewall is disabled ( temporarily, we will be installing CSF later in this article) .


# /etc/init.d/iptables stop

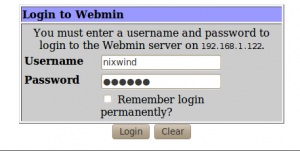
You can access webmin with

http://server_ip:10000
Username and Password you have given during installation

2) Install a Theme ( Optional )

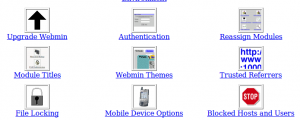
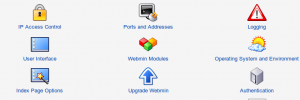
I’m going to use Vitualmin Framed theme. To Install a theme, click on Webmin Configuration


Click on Webmin Themes

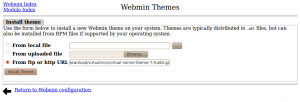
On Webmin Themes menu, select From ftp or http url and specific the exact theme file there.
VirtualMin Framed Theme url :  http://download.webmin.com/download/virtualmin/virtual-server-theme-X.x.wbt.gz

Click on Install Theme

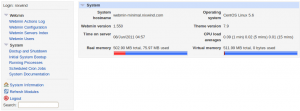
Then go to Webmin Themes again and select VirtualMin Framed Theme as current theme.

Click on Change, that’s all


3) Install Config Server Firewall for firewall management with Webmin.

Install CSF

Login to server as root and execute the below commands.

# cd /usr/src/
# wget http://www.configserver.com/free/csf.tgz
# tar -zxvf csf.tgz
# cd csf/
# sh install.sh

Install Webmin module of CSF

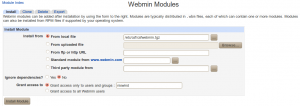
Select Webmin Configuration from left menu and click on Webmin Modules

Select Install From local file and specific path as /etc/csf/csfwebmin.tgz

Click on “Install Module”

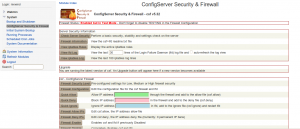
You need to configure CSF, Find it on Webmin under System >> ConfigServer Security & Firewall

Configure firewall with, Firewall Configuration and Check Server Security . Disable  testing mode after properly configuring the firewall.

Kloxo Installation

Kloxo is an ideal control panel for VPS with it’s smaller memory footprint. Here we can see how we can install Kloxo on a Centos 5 sever.

1) Login as root into the server

2) Configure Firewall to access Kloxo

Open Ports 7777 & 7778 on Firewall and disable SElinux.
# iptables -A INPUT -p tcp --dport 7777 -j ACCEPT
# iptables -A INPUT -p tcp --dport 7778 -j ACCEPT
# setenforce 0

3) Set a hostname for the server

# hostname kloxo.example.com
To make the change permanent add the below line on /etc/sysconfig/network file
HOSTNAME=kloxo.example.com

3) Install Kloxo

# yum install -y wget
# cd  /usr/local/src
# wget http://download.lxcenter.org/download/kloxo/production/kloxo-install-master.sh
# sh ./kloxo-install-master.sh

4) Login

Url : https://your_server_ip:7778
Username : admin
Password : admin

You can use the above details to login to Kloxo for the first time,

Please see this article for howto setup Kloxo after installation.

Create MySQL database and user with cPanel

MySQL Database Wizard can be used to set up MySQL database, create database user and assign needed privileges. A MySQL Databases allow you to store lots of information in an easy to access manner.

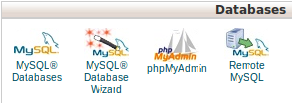
1) Click on the “MySQL database Wizard” button on the home page under Databases.

2) To set up a MySQL database,

a) Enter a name for the database in the text box ” New Database”.

b) Click the button Next Step”.

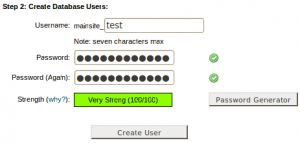
3) On Next step Create user , who have access to the new database.


a) Enter a name for the user allowed to manage the database in the text box “Username”.

b) Enter a strong password for the user to login or use “Password Generator” to generate a strong password.

c) Click ” Create User” to create the new MySQL user.

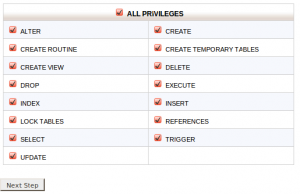
3) The next step is to give privileges to the user.


a) Select the privileges you wish to grant the user.

b) For full privilege click the check box ALL PRIVILEGES”.

c) Click “Next Step” to save the privileges.

You will get a message stating that the database and user account were successfully set up. The page will also have the following options.

  • Add another database – To Create a New Database.
  • Add another user for your MySQL Database – To add additional user for the created database.
  • Return to Home – To go to home screen of cPanel.


The Index Manager allows you to customize the way a directory will be viewed on
the web.

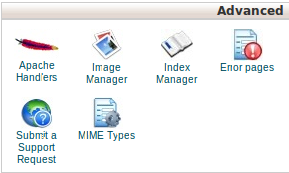
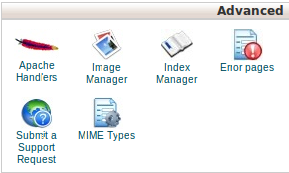
1) Click on the Index Manager button on the home page.

2) Click on the name of the directory you wish to change the indexing options.

3) Click on the radio button next to the option that you want to use for this folder.

Default System Setting – The default defined by your web host will be used.

No Indexing – The contents of the directory are not listed.

Standard Indexing (filename only) – Contents appear only as filenames.

Fancy Indexing (filename and description) – Information about the files, such as the size and time last modified, appear.

Click ” Save”, to save the entire setting.

Add a MIME Type using cPanel

MIME types tell browsers how to handle specific extensions. Adding MIME types is useful for enabling visitors’ browsers to handle new technologies as they come out.

1) Click on the MIME Types button on the home page.

2) To add a MIME type

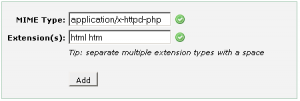
a) Enter the name of the file type’s handler into the text box “Mime Type” .

b) Enter the file extension, separate each entry with a space in the text boxExtension(s)started with a dot (“.”).

3) Existing MIME Types are listed under “User Defined MIME Types”.

Click on the Remove button of appropriate handler to delete an existing MIME Types.

Here is an example of the cPanel interface.

mimetype

The above example tells Apache to treat my .html and .htm files as PHP files. This is helpful if your .html files have PHP code inside, but you cannot rename the files to the .php extension

Add a Apache Handlers with cPanel

Apache handlers tells the server how to handle files having specific extension. Apache handlers control how your site’s  Apache web server software manages certain file types and file extensions.

You can configure Apache  to handle a new file type with the help of “Apache handlers” on cPanel.

1) Click on the Apache handlers button on the home page.

2) To add an Apache handler


a) Enter the handler name into the text box “Handler”.

b) Enter the file extension, separate each entry with a space in the text boxExtension(s)started with a dot (“.”).

c) ClickAdd” to add the new appache handler.

3) Existing user-defined handler are seen under “User Defined Apache Handlers”


a) Click on the Remove button of appropriate handler to delete an existing handler.

The file extension automatically supported by the Apache server are seen under “System Apache Handlers”


How to schedule a Cron job with cPanel

You can use cPanel to set the cronjobs for your application or any other task. Cron jobs are scheduled tasks that take place at predefined times or intervals on the server.

1) Click on the Cron jobs button on the home page.

2) The first one is for adding a cron email.

Cron Email is used to send notifications whenever your cron jobs are run.

a) Enter the email address at which you wish to receive the notifications in the text box “Email“.

b) Click the “Update Emailbutton.

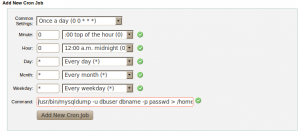
3) To set up a cron job

Configure any interval at which you wish to run the cron job

a) Common Settings The First menu allows you to select a commonly used interval without having to specify settings for the minute, hour, day, month.

b) Minute – Select the number of minutes between running the cron job, or the minute each hour on which you wish to run the cron job.

c) HourSelect the number of hours between running the cron job, or the hour each day on which you wish to run the cron job.

d) Day – Select the number of days between running the cron job, or the day of the month on which you wish to run the cron job.

e) Month – Select the number of months between running the cron job, or the month of the year in which you wish to run the cron job.

f) Weekday – select the day or days of the week on which you wish to run the cron job.

Type the command you wish the system to run in the text box “Command”.

The current cron jobs are listed under “Current Cron Jobs”.

4) You can edit / delete the current cron jobs.

a) To edit a current cron job.

Locate the cron job and click “Edit”.

Edit the settings you wish to change.

Click “Edit Line” to save the edited cron job.

b) To delete a current cron job.

Click Delete” in corresponding cron job that you want to delete.

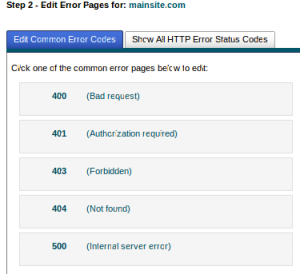
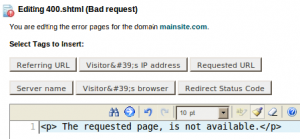
With cPanel, you can create customized error pages for 400, 401,403, 404, 500 errors. An error page informs a visitor when there is a problem accessing your site.

1) Click on the Error pages button on the home page.

2) Select a domain from the combo box “Managing” to manage the error pages.


3) Click the error code for the page you wish to edit.

For more error code click on the tab ” Show All HTTP Error Status Codes” .


4) Enter the HTML code for the error page. You can use the buttons at the top of the page to insert variables into the displayed code.

Click “Save” to save the HTML code for the error page.