Virtualmin :: Adding new website

To add a new site/domain (Virtual Server) to Webmin please use the following steps.

  1. Login to Webmin
  2. Select Virtualmin
  3. Select  the Create Virtual Server option
  4. Fill in the required information for the domain
    • Domain name
    • Description
    • Administration password
    • Server configuration template
    • Account plan
    • Administration username

Screenshot from 2018-07-05 01-33-33


Click Create Server

Virtualmin :: Account Plans

Each plan defines disk quotas, limits on domains, mailboxes and aliases, allowed features and allowed editing capabilities for servers.

Creating Plans::

Plans can be created by the master administrator and by resellers.

By default a newly installed Virtualmin system will have a single Default Plan, but you can create others by following the steps below :

  • Open the System Settings menu, and click on Account Plans.
  • Click on Add a new account plan.
  • Enter a unique name for the plan, and fill in the limits as you wish. Typical plans include disk quota, domain and bandwidth limits.
  • Click the Create button.

For making the new plan as default plan

Set default plan menu and click Change Default.


Virtualmin :: Create an email account

  1. Choose the domain you would like to add the email account to. You can do that by selecting the domain name from the drop-down box on the top-left.
  2. Click Edit Users.
  3. Click Add a user to this server.
  4. You can now enter the email address, full name, and password to use for this email account.
  5. Click Create, and Virtualmin will add the email account to your server.


This short article is to give an idea on how you can install latest version of wordpress on your hosting account.

You need to have,

Filezilla click here to get it ( or any other FTP client )
A cPanel hosting account. Get it here

Step 1

Download latest wordpress version. Click here to get it.

Step2

Uncompress latest.zip file.

Step3

Use Filezilla to upload the uncompressed files to the desired hosting account location. You can upload to public_html or any other location inside.

Uploading with filezilla

Uploading with filezilla


Step 4

Create database and users with your cPanel, Please see this article,

Step 5

Access the url were wordpress files are uploaded. You will get a screen as below . Click on create a configuration file.

Wordpress Installation


Step 6

Give the database and user details you have created with cPanel on the below stepWordPress Installation 2. Click on submit button.


On next screen click on run the install


Wordpress Installation 3


Step 7

Give site name, user name password and your email address on the next screen and click Install

Wordpress Installation 4


All set login and go !!!

The main purpose of Google APPS is ability to host mail service outside of your main domain and get full functionality of gmail services. To set up google MX as your mail server.

1. Log in to your cPanel account with the provided login credentials.

2. Under the Mail header click MX Entry in your cpanel.

google-cPanel-MXentry

3. Choose the domain for which you wish to use external email.

4. Three new sections will show up and under the Email Routing section you will want to select Remote Mail Exchanger.

5. Under the Add New Record section you will want to add your external mail server records.

For Google Apps you can see a list of servers at http://www.google.com/support/a/bin/answer.py?answer=174125

6. Once you have added your external MX Entries, you will want to make sure to remove any other entries.

Congratulations! You have successfully pointed MX records to your external mail provider. Keep in mind that changes to MX records may take up to 48 hours to take effect.

SSH is often used to login from one system to another without requiring passwords.

The syntax of the ssh-keygen file is as follows:

ssh-keygen -b bits – Specifies the number of bits in the key to create. The minimum bit length is 512 bits and the default length is 2048 bits.
ssh-keygen -p – Requests changing the passphrase of a private key file instead of creating a new private key.
ssh-keygen -t – Specifies the type of key to create.
ssh-keygen -q – Quiets ssh-keygen. It is used by the /etc/rc file while creating a new key.
ssh-keygen -N – Provides a new Passphrase.

The SSH-keygen tool generate a secret key.

Step :

1) Login into a local machine.

2) Take a Terminal (Application/Accessories/Terminal)

3)  # ssh-keygen

When we enter “ssh-keygen” in terminal of local machine we get the options like below

The default path of generating the keygen is in /home/user/.ssh/id_rsa.Then press “Enter”.

4)Enter a alphanumeric passphrase you will enter will be used for encrypting your private key, if not press “Enter”.
If you want to create a passphrase type your passphrase once again to confirm it.

After the completion of this the private key is generated.The private key will be saved in .ssh/id_rsa. This file is read-only and only for you. No one else must see the content of that file, as it is used to decrypt all correspondence encrypted with the public key. The public key is save in .ssh/id_rsa.pub.

5)Then public key content of local machine is then copied in file .ssh/authorized_keys of the system you wish to SSH to without being prompted for a password.

scp .ssh/id_rsa.pub user@remote:~/.ssh/authorized_keys

Kloxo panel setup after installation

Kloxo is a light weight control panel that is ideal for a VPS. Here we can see how to do initial setup of Kloxo after installation.

Login to Kloxo

Access Kloxo with https://my_server_ip:7777

You can use the below as login details when logging for the first time.

Username : admin
Password : admin

Change the admin password

On Old Password box use   : admin
Generate a secure password by clicking on Generate Password.

Click on Update button to set the new password.

Configure Lxgaurd

On the warning message shown click on, Click here to configure Lxgaurd . You can also go to Lxgaurd settings by, Clicking on admin on left panel > Under Security section > Lxgaurd

Under the “Lxgaurd” tab you can set the number of wrong login attempts that should disable and block access to Kloxo.

You can also whitelist a specific IP with “White List” tab

Configure Mail settings

Configure basic mail settings of the server. Clicking on admin on left panel > Under Web -Mail – Database section > Server Mail Settings.

On My Name field – add the hostname of your server, please make sure that the hostname is resolving properly.
Click Update button to save the settings.

Create a DNS template.

create a dns tempalate to create clients and domains, you can use this template settings as the DNS settings for the domains you add.

On

DNS Template Name : give a desired name for your template without spaces
Web IPaddress : select the IP address from the list to which you want to point the website.
Mail IPaddress : select the IP address from the list on which mail server is listening
Primary DNS : specify the first main nameserver
Secondary DNS : specify the second main nameserver

Click on Add to create DNS template.

Kloxo has been setup for use, you can now proceed and create plans and clients as mention on this post,

WordPress is one of the best CMS and blog engines available today, and you can used it to power anything from your personal site. But the great thing about WordPress is that you can either get a free hosted blog or you can download the software and run it on your own server for free.  Many webhosts today offer scripts that make installing WordPress as easy as possible, so here we’re going to look at how you can install WordPress in only a few steps in cPanel with Softaculous. Installing WordPress manually isn’t too hard, but with Softaculous, it’s so easy anyone could do it.

This article will give you a step by step guide on how to install WordPress from your cPanel using Softaculous.

Step 1 : Login to your website’s admin panel to get started installing WordPress on your site. Usually, you can locate it at yourwebsite.com/cpanel or yourwebsite.com:2082.

cpanel_login

Step 2 : Scroll down to the Software/Services section, and click the Softaculous link.

software_services

Step 3 : To install WordPress, click the WordPress link on the left-hand sidebar in Softaculous.

WordPress_link_in_softaculous

Step 4 : This page will give you some information about WordPress, including ratings and reviews from other users.  Click the Install link above the header to start the installation.

WordPress_info

Step 5 : Now you’ll need to enter some information about your site.  Softaculous will automatically fill in default settings, but you may want to customize them.

WP_set-up_page

At the top of the page, you will have to select the domain where you wish to install WordPress. Select the directory to install WordPress on. By default, it will install to yourdomain.com/wp, but if you want yourdomain.com to go directly to WordPress, then leave this field blank.

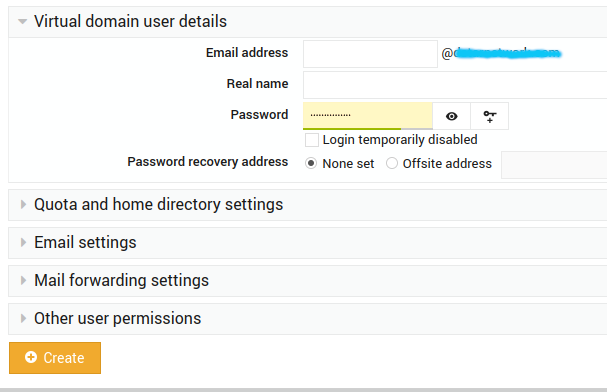
Step 6 : Now enter a name and description for your site, as well as an administrative username, password, and email.  If you’d like a more secure password, click the key logo and a random generated password will be entered in the field.

wordpress_database

If you’d like a record of your site’s settings, enter your email in the bottom field under the Install button.  Finally, when you’re finished, click Install.

Step 7 : You will then get a confirmation page of your installation.

WordPress_installation_confirmation_page

Step 8 : Click the link to go to the WordPress admin page, or simply browse to yourdomain.com/wp-login.php. You must now use the login name (username) and password that you had set during the installation.

wordpress_login_page

Step 9 : The first time you login, WordPress may prompt you to change your password.  Since you just choose the password for your site, this step is unnecessary. Click No Thanks, Do not remind me again to chose this notification.

change_password_WordPress

Step 10 : Now you can add posts and pictures, change the theme, and customize the settings of your WordPress site directly from the WordPress Dashboard:

wordpress_dashboard

Step 11 : Here is new WordPress site after installing with Softaculous and submitting first post:

wordpress_blog

Parked Domains are often used by certain companies that want to have more than one web address for their official uses purposes.They will display the same website as your primary domain.

For example, if your primary domain is nixwind.com and it is the primary domain , you can able to set up windnix.com as a parked domain and it will load the content of nixwind.com. Hence the content of nixwind.com is loading in the browser, the address bar will display as http://windnix.com/.


Parked Domains allow you to “point” or “park” additional domain names to your existing hosting account main domain. Park domain will show the same content of your main domain.

1) Click on the “Parked Domains” button on the home page under Domains.


2) Enter the domain you wish to park in the available text field.

Click Add Domain“, to add the Parked Domain.

3) Existed Parked Domain are listed under the “Remove Parked Domains”.


a) Click the link under ” Domain Root” that corresponds to the  Parked domain, for viewing the file manager.

b) To Enable or Disable redirection of a parked domain , click on the  link Redirects to“.


Enter the url to which you would like to redirect the parked domain  in the text box.  

To disable the redirect, click the buttonDisable Redirection.

c) For deleting a parked domain , click the “Remove” link corresponding to the parked domain .

Install and configure CSF/LFD

CSF is one of the popular firewall which is based on iptables.  CSF can be used and managed with UI of control panels like cPanel, DirectAdmin and Webmin. Here we can see how we can install and do basic configuration of CSF ( ConfigServer Security & Firewall ) & LFD ( Login Failure Daemon )  on a linux server.

How to install ?

For downloading all the csf package.

# cd /usr/local/src/
# wget http://www.configserver.com/free/csf.tgz

Uncompress the packages.

# tar -xvzf csf.tgz

Running the installation script

# cd csf
# sh install.sh

Configuration

a) Main part of configuration is opening up the needed ports

below command will give you an idea of  current listening ports and processes in the server

# netstat -pln
# ps aux

find out the ports of services that you want to open and specific them on file /etc/csf/csf.conf with directives

TCP_IN  —> incoming TCP ports
TCP_OUT —> outgoing TCP ports
UDP_IN —> incoming UDP ports
UDP_OUT —> outgoing UDP ports

b) Read through the configuration, if you feel everything is okay you can disable testing by setting the first directive on configuration /etc/csf/csf.conf as below

TESTING = 0

restart csf with

# csf -r

Control Panels
CSF currently has UI for cPanel, DirectAdmin and Webmin. No specific installation changes required for cPanel and DirectAdmin, once CSF is installed you can view and manage it with cPanel/DA. You can find webmin CSF module installation instructions here.

Uninstallation

On cPanel servers:
cd /etc/csf
sh uninstall.sh

On DirectAdmin servers:
cd /etc/csf
sh uninstall.directadmin.sh

On generic linux servers:
cd /etc/csf
sh uninstall.generic.sh